Jun 19, 2010

Etching

My sister needed a gift for one of her friends who is getting married this weekend. Here's what I came up with!! This was my first time etching -- I'm really happy with how it turned out!


Close up of Mr glass:

Close up of Mrs glass:

Close up of glass bottom:

Card:

Inside of card:


Mr & Mrs on the glasses is from Lyrical Letters
On the card:
  • Scallops are from Storybook
  • Love is from Opposites Attract
  • Hearts are from Stamping.
  • Font Freestyle Script printed from computer
Embossing Sizzix swirls and dots embossing folder

Jun 18, 2010

Blog Truffles

Guess what?! Molly over at Creative Inspirations Paint is giving aways some Blog Truffles!!! 5 jars of paint will be given to a randomly chosen winner!! I've been raving about these paints for a while now -- You definitely need to head on over to the CI Blog and enter!  You have until Noon (MST) Monday, July 5!! Good luck!!!

Jun 10, 2010

Creative Inspiration Challenge : It's Clearly Sparkling!

Hi Everyone!! This weeks challenge was to use CI Paints on acetate or acrylic.  I decided to use the negatives from a vinyl cut and paint on a 6x6 acrylic square.  LOVE how it turned out! So sparkly!  I wish you could see it IRL (in real life)! It's awesome! Pictures don't do it justice!!!

Photobucket

Up close:
Photobucket

I think that I am going to bind it with my BIA and use it as a notebook for thoughts and ideas! I will be sure to post the finished product! 

Make sure you head on over to the CI Blog to see what the other fantastic DT girls have done!

Thanks for stopping by!!

Photobucket

May 27, 2010

Going 3D -- CI Paint DT Challenge

Hi Everyone!!! Things are soo busy lately! Anyone else feeling the pick up in your schedules as the weather gets nicer??  This week the CI DT was challenged to Go 3D with their paints.  Here's what I came up with

Photobucket
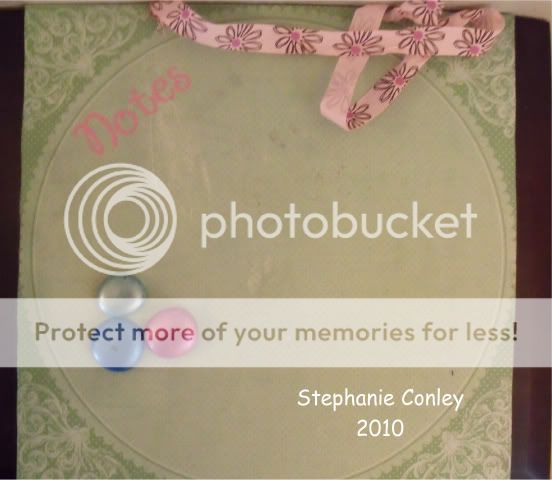
It's a magnet board that I modge podged (love that stuff!) with scrapbook paper.  I then painted 3 clear gem stones in Sea Foam, Aqua Marine, and Tickled Pink and glued a magnet to the back side.  I was so amazed at how well the paint took to the gems! AWESOME!  It really gives my magnet board a pop of color! I can't wait to hang this up in my kitchen!!
Here's a close up -- Can you say HELLO COLOR!!!!
Photobucket

Make sure you pop on over to the CI Paints Blog to check out what the other DT ladies have created! You will LOVE IT!!

Thanks for stopping by!!

Photobucket

May 14, 2010

Simple Cards

Sometimes simple cards are the best. Here are a couple I've created.  Both are embossed with cuddlebugs spots and dots folder.


Photobucket

Photobucket

Photobucket
I used stickles to give the flowers some bling!

Thanks for stopping by!!

May 13, 2010

It's all in the Icing: Creative Inspirations Challenge

Yay! It's time for another Creative Inspiration Design Team project! This was was titled -- It's all in the icing, so I made a cupcake window card. It's the first time I've made a window card, and I really like it!


Close up of the shimmer!!

I cut window card and cupcakes with my cricit.. I painted the cupcakes with tickled pink and then added a layer of winter white to give it some more shimmer. I painted the wrapper of the cupcake with my fantastix and carmel paint.

Make sure you head on over to the Creative Insirpiration Blog and check out what the other DT girls have done!! You will be blown away with the creativity!!!

Have you added these paints to your list yet?!

Thanks for stopping by!

Photobucket

May 12, 2010

Banner Card

I really like all the banners people have been using over at the cricut message boards, but sadly I don't have the cartridge that has that image on it.  Soooo...Design Studio to the rescue!!! I made my own banner and I really like how it turned out!

Photobucket

Photobucket

I embossed the paper with cuttlebug's swiss dots and d'vine swirls folders.

Thanks for stopping by!!

Apr 22, 2010

Creative Inspirations Sketch Challenge

Yay! It's time for another Creative Inspiration Design Team project!

Photobucket

Close up of the BLING!
Photobucket

I cut my flower out of purple paper from the Paisley Cricut Cartrdige. I painted it with Royal Purple CI Paint. It matched my paper perfectly and gave it the most amazing spakle.  I used a white prima flower on top. I painted it with a mixture of  Fairy Dust and Royal Purple paint. I added a jewel to the center.  Paper is from DCWV.

Make sure you head on over to the Creative Insirpiration Blog and check out what the other DT girls have done!! You will be blown away with the BLING!

You definitely need to add these paints to your MUST have list!

Thanks for stopping by!


Photobucket

Apr 8, 2010

Creative Inspiration Color Challenge

Yay! It's my first post for the Creative Inspiration Design Team. I previously showed you my Think Spring card that I made using creative inspirations paints -- if you missed it, check it out HERE!

Here's my latest project using CI Paints! BTW --they are sooo incredible! They are soo easy to use and have such AMAZING color!! You definitely have to add these to your must have list!


I cut my flower out of velum on my cricut. There are 8 layers! They I painted it with Sunshine and Green Olive CI Paints. Isn't it amazing how well the paints colored the velum?!! I embossed the card with Cuttlebugs D'Vine Swirls embossing folder and then painted Lavender on the embossing. I dipped my paintbrush into water and then into the paint to get a more subtle effect.


Photobucket

Close up of flower  -- Can you see all that SHIMMER?!!!
Photobucket

Close up of card -- the background shimmers too!
Photobucket

Make sure you head on over to the Creative Insirpiration Blog and check out what the other DT girls have done!! You will be blown away with the BLING! 

The flower is cut with the George cricut cartridge. I got the cut file from: http://www.paperscissorsinc.com/2009/02/gerbera-daisy-for-cricut-design-studio.html

Thanks for stopping by!

Photobucket

Apr 6, 2010

Beach Stair Step Card

Photobucket

Photobucket

The paper is from DCWV.  I used Life is a Beach to cut out all the images, stickles and I embossed the trees with swiss dots using my rolling pin method. 

Apr 5, 2010

Bunny Card!

Isn't he cute?!

Photobucket

Bunny is from A Child's Year. It was actually a tag, but I hid the contours and made him super big in DS. YAY for DS! I embossed him with swiss dots using my rolling pin method (no cuttlebug ) Then used a SU sweet treat cup to hold the jelly beans!
Thanks for looking!!

Photobucket

Apr 3, 2010

Pop Top Can

This was SOOO much fun to do. I've seen tons of posts on the cricut message board and other websites, so I decided to try one for myself. They are sooo easy and sooo fun!  I made this for my BFF for her birthday and filled it with office goodies -- pictured below. I also made the binder clips that are pictured.
Photobucket
Top View
Photobucket
Finished with vinyl

Photobucket
Inside Contents
Photobucket


Want to know how to make your own??

  1. Take a can with a pop top lid -- I used a pear can -- and use a safety can open to open the bottom.
  2. Empty out the contents, wash the can and lid and peel the label..  Allow to dry
  3. Cut paper to fit around the outside of the can.  Glue or tape.
  4. Decorate the outside of the can.  I used vinyl to put her name on it. You can use rhinestones, stickers, ribbon, the possibilities are ENDLESS!!
  5. Decorate the lid.  I traced a piece of paper to fit on the lid, leaving room for the tab.  Then I decorated with ribbon and a tag that says "pull"
  6. Fill the inside with goodies.
  7. Use superglue (be careful not to glue your fingers like I did) and adhere the bottom.  Allow to try.
  8. Give to recipient!!
For the binder clips -- I just cut soem paper to size of the clip, then modge podged on. EASY!!!
Photobucket

Apr 2, 2010

Simple Tree Card

I do a monthly swap with a few other stay at home moms.  We have to make something that is useable but the other person and send the same thing to each person.  Here's what I came up with for the first month. The inside is stamped with "Happy Spring".

Photobucket


Card is embossed with Cuttlebug embossing folder Spots & Dots.  Tree is from Every Day Paper Dolls.
Photobucket

Apr 1, 2010

Flower Pot

I saw a tutorial for these over at this blog: http://cardcreationsbylorraine.blogspot.com/2009/12/poinsettia-flower-pot-card.html

Here's my take on it!
Photobucket

Photobucket

Thanks for looking!
Photobucket

Mar 31, 2010

Toadally

Here's a cute lil' frog I made.  He's fun, fast and cute. I just love the big eyes! I found them at the dollar store!  I embossed him with cuttlebug's tiny mosaic folder. I used my DS to create the log.

Photobucket

Photobucket

Thanks for looking!!
Photobucket

Mar 22, 2010

Lil' Pickup!

Here's my pick up truck!!  I made this for my sister! 
Photobucket

Inside:

Photobucket

I used my flash so you could see the BLING!

Photobucket


The how to:
  • Used Design Studio to weld the pickup (Cartridge New Arrival) & flowers (Cartridge Paisely) together
  • Used Creative Inspiration Paints to paint the flowers (note: the flowers were cut out of the same pink paper as the truck. Just so you can see how much the paint covers) & the window.
    • Paint Colors:
      • Flowers: Rose Quartz, Royal Purple, Fuchsia
      • Window: Sea Foam
  • Added buttons to tires, head lamp and flower centers.

Photobucket

Mar 14, 2010

Think Spring Card

I got a chance to play with the Creative Inspriation Paints the other day -- OH MY GOODNESS!! They are AMAZING!!!  I was expecting them to be more clear, but they are actually a paint. I welded think spring in CDS and cut the words and the flowers out on white cardstock and then painted them with CI Paints.  I ABSOLUTELY LOVE THEM!!!  Purple cardstock is embossed with the cuttlebug spots and dots folder.

I can't wait to play some more!! I've heard some of the other DT girls are using them in misting bottles, in stamp pads, and other fun techniques. Make sure you check out their blogs as well (listed below)!!
Photobucket

Close up:
Photobucket

CI Paints used were: Lavender, Sunshine, and Green Olive

CTMH Damask Divas

Designing For

Designing For
Creative Inspirations

Contact us!

Feel free to contact us with any questions or custom orders! conxioncreations@charter.net

Followers

Our Etsy Shop:

My Blog Awards

My Blog Awards
Sunshine Award

Beautiful Blogger

Copyright:

All images,photos and writing, unless otherwise noted, are property of CONIXON CREATIONS 2010. All Rights Reserved. All contents of this blog may not be reproduced in any way without my explicit permission. Thanks ♥

Find us on Facebook!

Blog Design By: